Python 'E325: Attention' error


#1

Hi

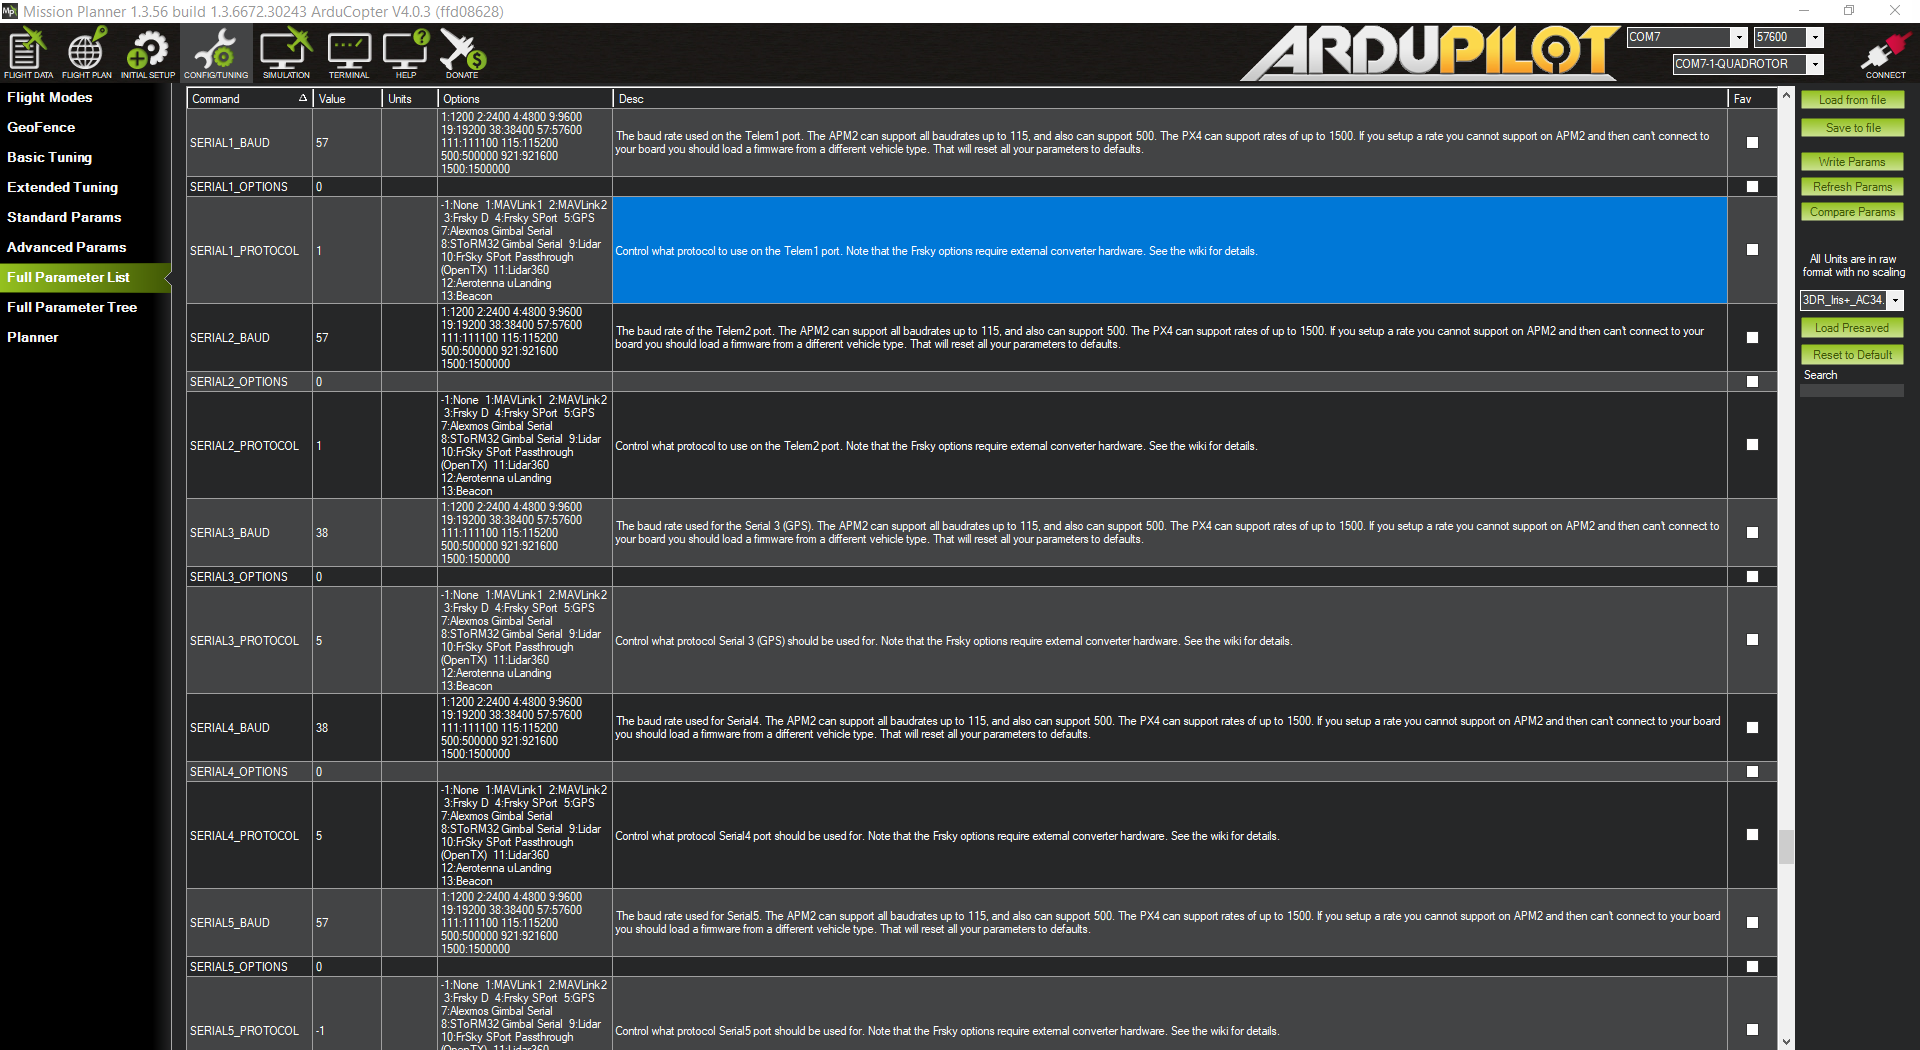
My Pixhawk drone has been built and flying like a charm, using the Remote Controller. But I’ve run into some issues with the automated side of things. Specifically, I’m simply following the tutorial steps - https://www.youtube.com/watch?v=kB9YyG2V-nA&t=1945s - from 21:00-28:00.

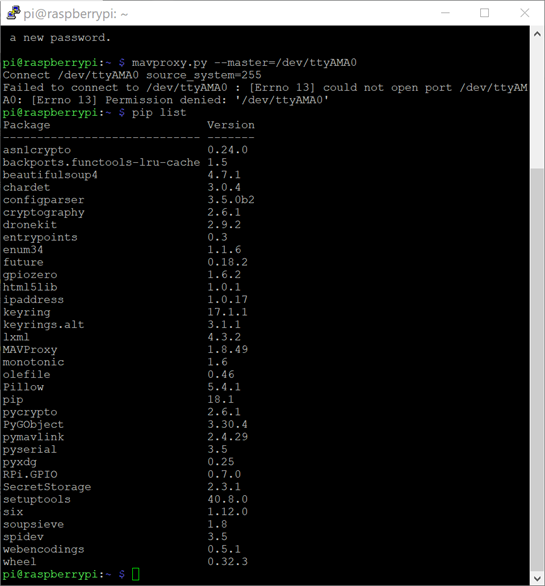
The drone ‘armed’ successfully, using MavProxy (27:15), without any issues (on my first attempt only).

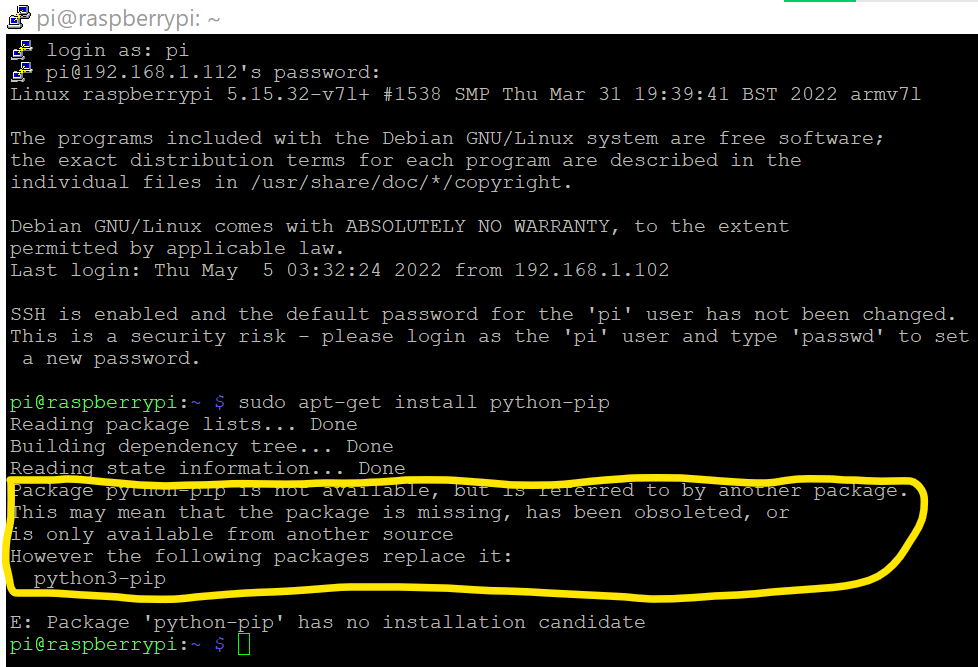
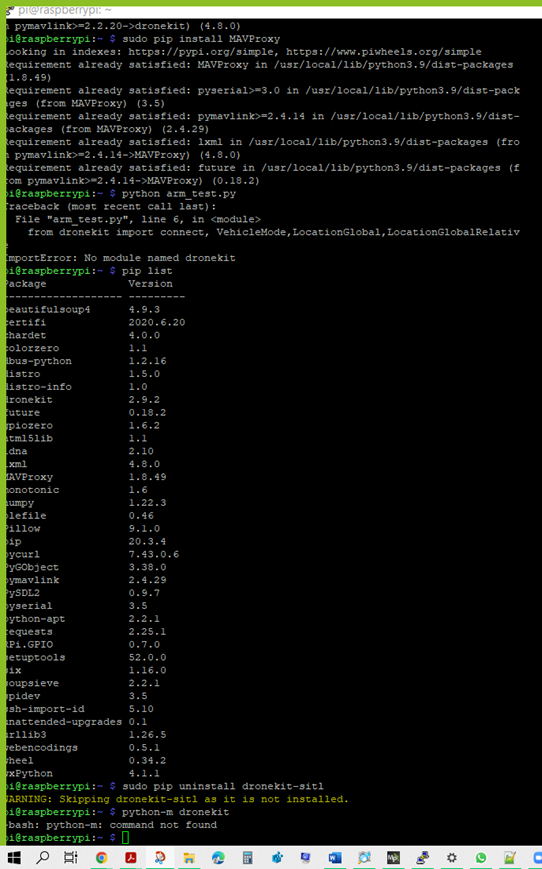
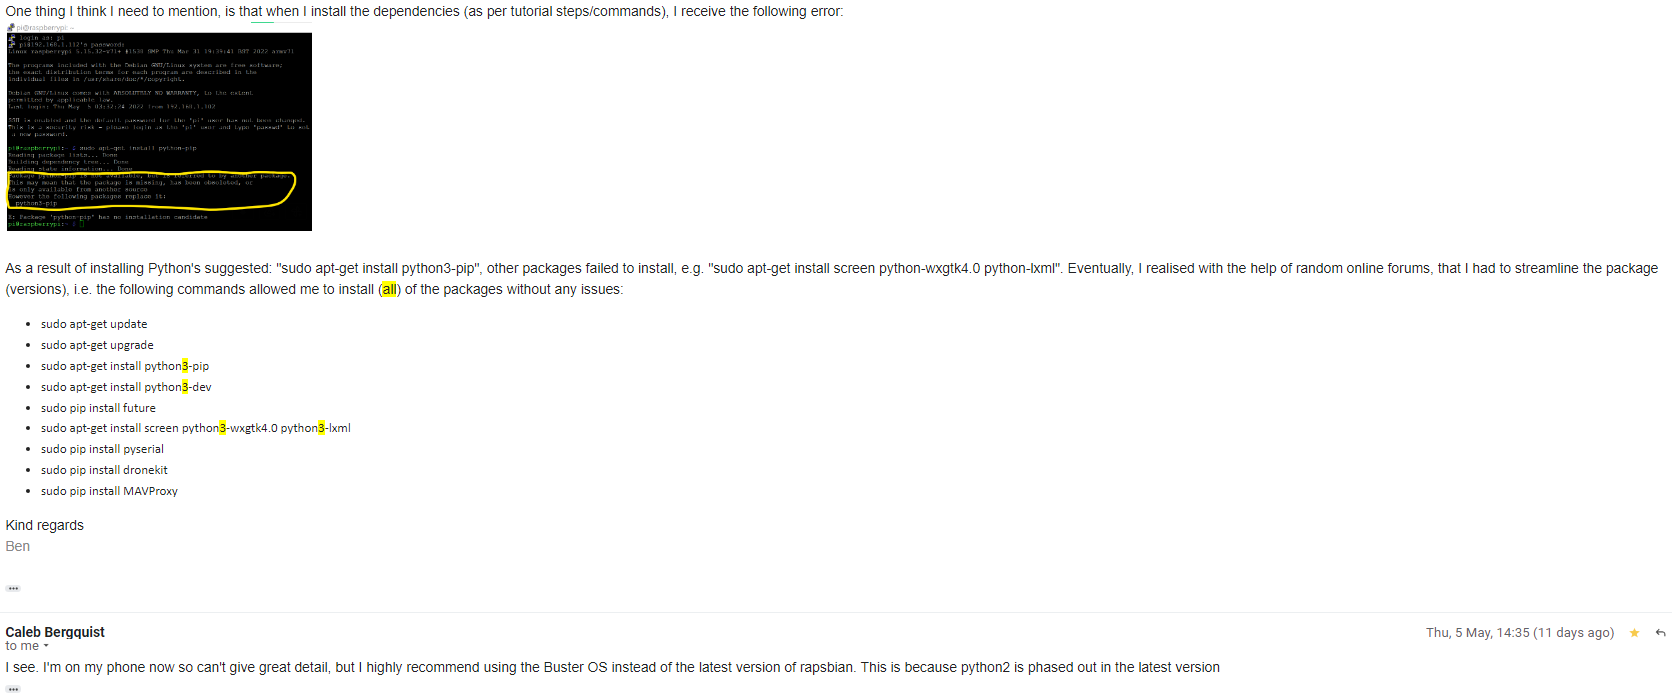
On my 2nd attempt, I once again installed all of the Python dependencies using Putty and followed the above steps. I did this on the basis that I had no prior confirmation (whilst logged into Putty) that all of the steps/actions had been cemented/written permanently during my 1st session. I’m merely guessing that repeating all of the steps is what led to me (not) being able to ‘arm’ on a subsequent attempt. Unfortunately I’m unable to recall which exact attempt this was …

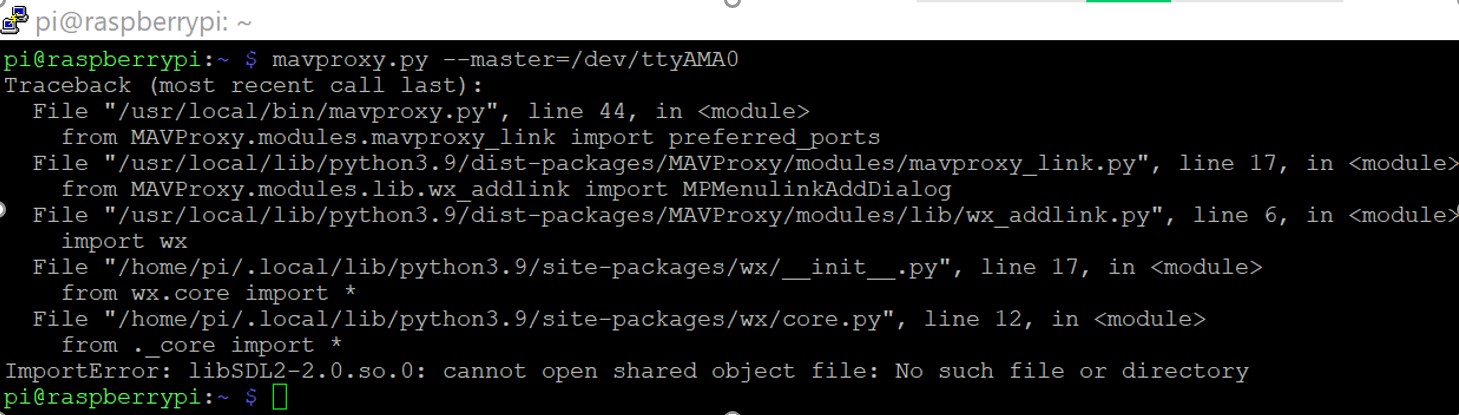
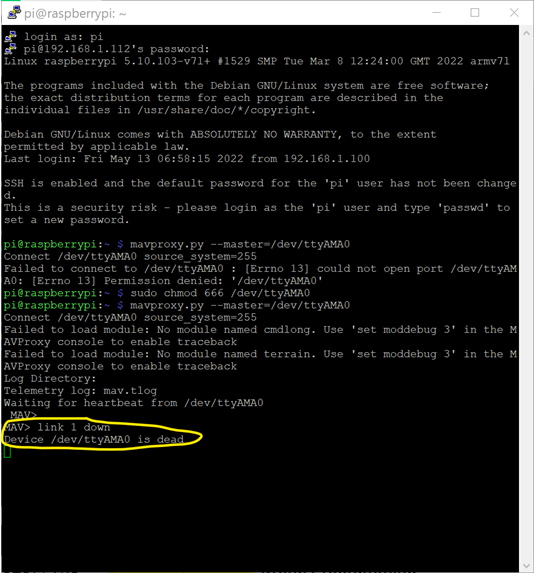
In case the screenshot below doesn’t open, here is a copy/pasted Putty response following my ‘mavproxy.py --master=/dev/ttyAMA0’ command:

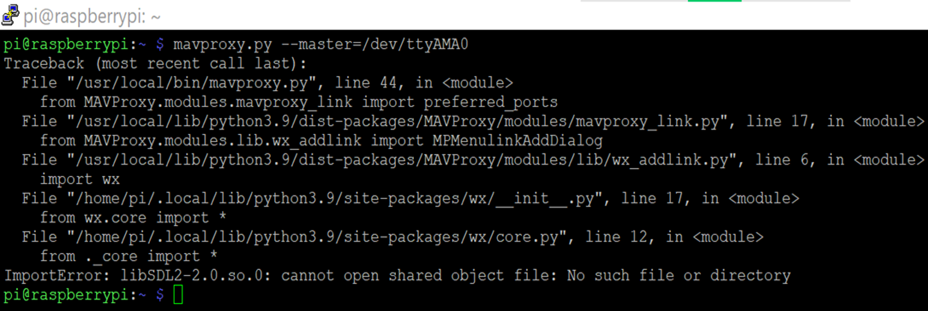
Traceback (most recent call last):

File "/usr/local/bin/mavproxy.py", line 44, in <module>

from MAVProxy.modules.mavproxy_link import preferred_ports

File "/usr/local/lib/python3.9/dist-packages/MAVProxy/modules/mavproxy_link.py", line 17, in <module>

from MAVProxy.modules.lib.wx_addlink import MPMenulinkAddDialog

File "/usr/local/lib/python3.9/dist-packages/MAVProxy/modules/lib/wx_addlink.py", line 6, in <module>

import wx”

File "/home/pi/.local/lib/python3.9/site-packages/wx/init.py", line 17, in <module>

**from wx.core import ***

File "/home/pi/.local/lib/python3.9/site-packages/wx/core.py", line 12, in <module>

**from ._core import ***

ImportError: libSDL2-2.0.so.0: cannot open shared object file: No such file or directory

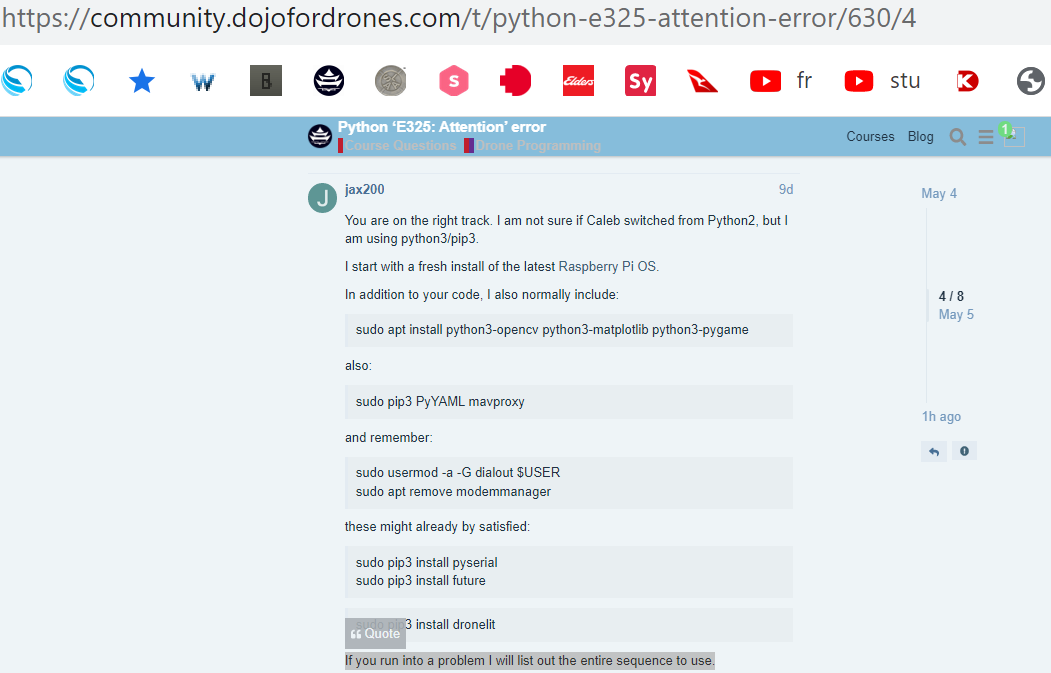
I recognise that if the drone can no longer be armed, it’s probably useless to attempt the subsequent DroneKit mission writing … But in any case, when I now enter the ‘vi takeoff_and_land.py’ command, Putty responds with the (attached) ‘E325: Attention’ error. If the attachment fails to open for whatever reason, here is the copy/pasted response:

![ARMING%20ERROR|690x196]
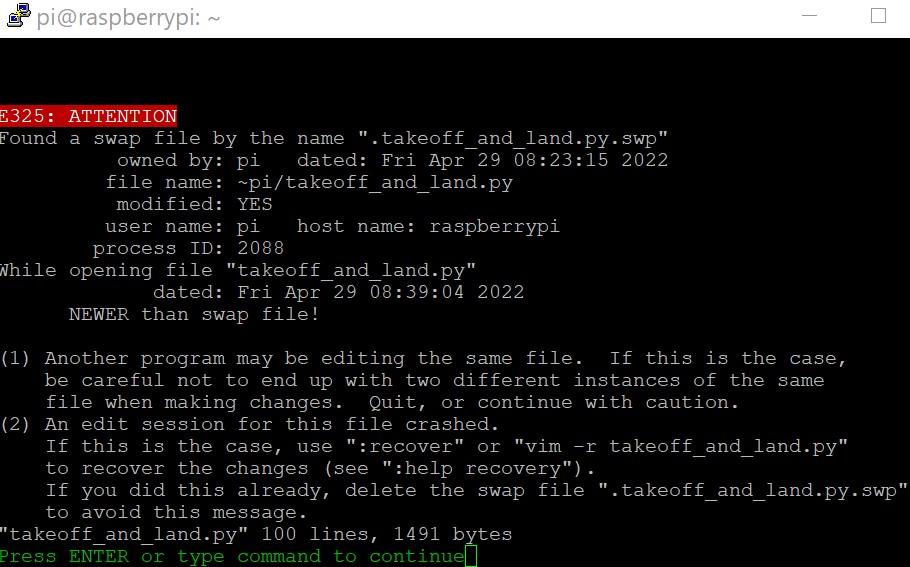
E325: ATTENTION

Found a swap file by the name ".takeoff_and_land.py.swp"

owned by: pi dated: Fri Apr 29 08:23:15 2022

file name: ~pi/takeoff_and_land.py

modified: YES

user name: pi host name: raspberrypi

process ID: 2088

While opening file "takeoff_and_land.py"

dated: Fri Apr 29 08:39:04 2022

NEWER than swap file!

(1) Another program may be editing the same file. If this is the case,

be careful not to end up with two different instances of the same

file when making changes. Quit, or continue with caution.

(2) An edit session for this file crashed.

If this is the case, use ":recover" or "vim -r takeoff_and_land.py"

to recover the changes (see ":help recovery").

If you did this already, delete the swap file ".takeoff_and_land.py.swp"

to avoid this message.

"takeoff_and_land.py" 100 lines, 1491 bytes

Press ENTER or type command to continue

I’m just a beginner to the coding side of things, and I couldn’t find much help online. So I figured that I could possibly just reflash the MissionPlanner firmware onto a (new/formatted) SD Card and start from scratch (installing Python dependencies before ‘arming’). Upon doing so, the ‘Advanced IP Scanner’ doesn’t recognize the new SD card, but it (does) recognize the old SD card.

I also connected the telemetry cable to another functional Raspberry Pi 4, and repeated the above process, but again, the ‘Advanced IP Scanner’ doesn’t recognise the new SD card, while recognising the old SD card.

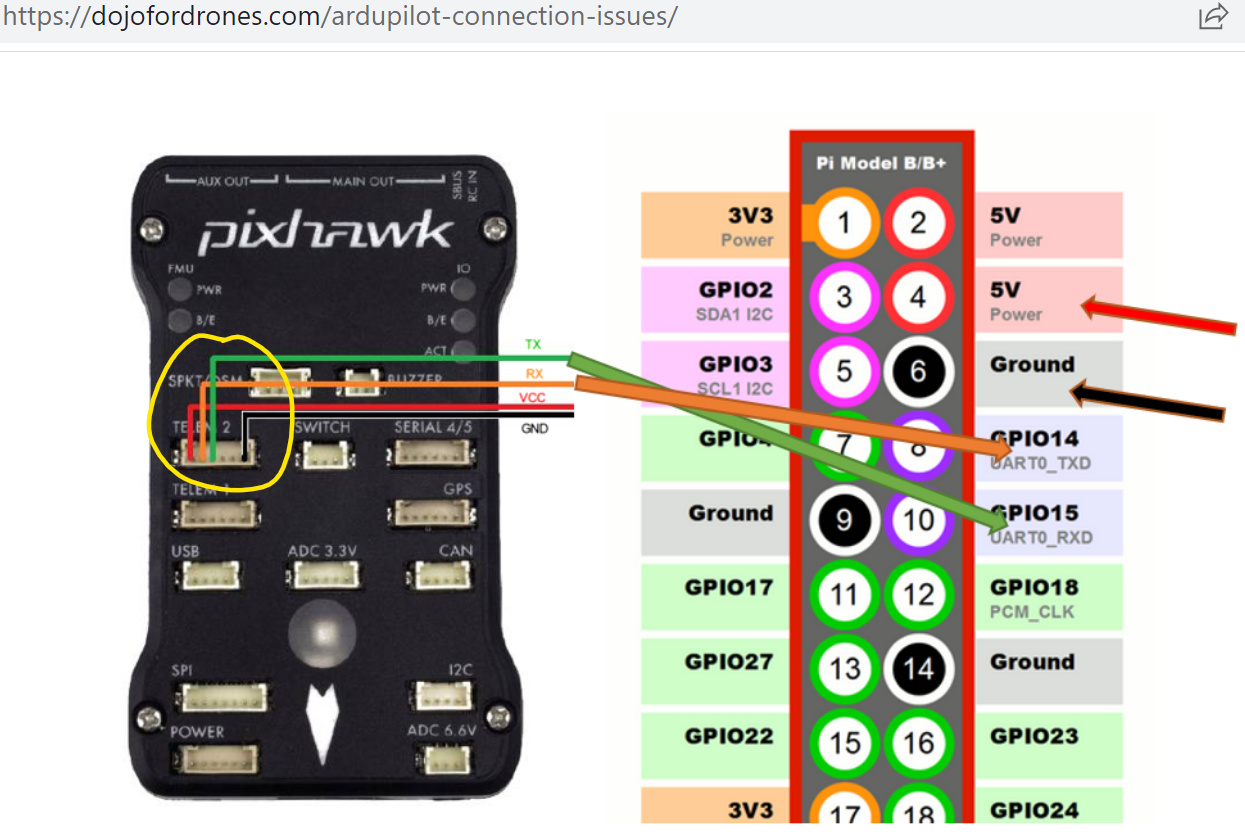
I followed this Dojo Troubleshooting Guide: https://dojofordrones.com/ardupilot-connection-issues/ , which I found online, and can confirm that I’ve actioned the ‘Common Reasons’ #: 1, 3, 4, 6, 8 recommendations, but the issue persists. I struggle to see how the remaining Reasons could be a culprit, and/or I’m struggling to wrap my head around the recommendations anyhow …

Please let me know if there’s anything you can suggest

Best regards
Ben


#2

Hello @BJ4

As a first step, why don’t you list out your build steps, especially the statement for installing all the dependencies?

Jack


#3

Hello Jack

Please forgive my ignorance; I’m very new to programming …

By “build steps” and a “statement for installing all the dependencies?”, are you suggesting I provide screenshots (for example) of all my dependency/package installation steps? If so, I’m more than happy to provide these.

Ben


#4

In the meantime, I thought I should also mention the following (which might be quite significant):

When I install the dependencies (as per tutorial steps/commands), I receive the following/attached error:

As a result of installing Python’s suggested: “sudo apt-get install python3-pip”, other packages failed to install, e.g. “sudo apt-get install screen python-wxgtk4.0 python-lxml”. Eventually, I realised with the help of random online forums, that I had to streamline the package (versions), i.e. the following commands (versions slightly modified) allowed me to install (all) of the packages without any issues:

  • sudo apt-get update
  • sudo apt-get upgrade
  • sudo apt-get install python3-pip
  • sudo apt-get install python3-dev
  • sudo pip install future
  • sudo apt-get install screen python3-wxgtk4.0 python3-lxml
  • sudo pip install pyserial
  • sudo pip install dronekit
  • sudo pip install MAVProxy

Kind regards
Ben


#5

You are on the right track. I am not sure if Caleb switched from Python2, but I am using python3/pip3.

I start with a fresh install of the latest Raspberry Pi OS.

In addition to your code, I also normally include:

sudo apt install python3-opencv python3-matplotlib python3-pygame

also:

sudo pip3 PyYAML mavproxy

and remember:

sudo usermod -a -G dialout $USER
sudo apt remove modemmanager

these might already by satisfied:

sudo pip3 install pyserial
sudo pip3 install future

sudo pip3 install dronelit

If you run into a problem I will list out the entire sequence to use.


#6

Hi

“Starting with a fresh install of the latest Raspberry Pi OS” proved a little challenging …

I spent a few hundred dollars of private tutoring from around the globe, trialling about 5 SD cards (due to: Etcher flash failure, SSH connection, etc. issues), 2 Raspberry Pi (RPIs), various RPI OSs, e.g. Legacy & Desktop (non-‘Lite’) versions, etc. …

This enabled me to finally do an error-free installation of all the required dependencies, as per the following tutorial which uses the ‘Buster’, rather than the current ‘Bullseye’, OS: https://www.youtube.com/watch?v=kB9YyG2V-nA&t=1945s

I would have provided the “build steps” for this, but since everything installed (exactly) as per the tutorial, I saw no need to screenshot everything. However, if you’d like me to nevertheless prepare these, please let me know. I have however attached a (current) ‘pip list’. It’s the closest thing that I find that may be similar of a “statement for installing all the dependencies”. Can you please suggest how I can obtain such a statement?

I did manage to ‘arm’ the drone (earlier) when using Bullseye, until Python told me that DroneKit is (not) installed, even though executing a ‘pip list’ command clearly shows that DroneKit was installed (attached). But the most recent error is (attached), i.e. “MAV> link 1 down … ”. If (if) it helps, I can confirm that I have Mission Planner 1.3.23 & ArduCopter V4.0.3 installed on the Board …

Please advise if there’s anything you can suggest.

Kind regards

Ben


#7

I am not sure Ben, perhaps there is a mix up of python and pip versions used. Note from my previous message I was using ‘pip3’ wherever it is used.

I have written a blog article if you continue to experience connection errors.


#8

I might be missing something, but in your “blog article”, is pin#2 (from left to right) representing ‘RX’ or ‘TX’? Because your diagram seems to be at odds with Caleb’s … I’ve indicated what I’m referring to by yellow circles in the screenshots below.

I also found the mention of possible “telemetry connection reversal” in an ArduPilot forum (screenshot below), but I’m not sure if it’s related … - https://discuss.ardupilot.org/t/what-is-the-pin-layout-for-pixhawk-2-1-telemetry-port/23128/4


#9

Other than Reason #1, I can confirm that issues: 2, 3, 4, 6, 8, are not a culprit to the “MAV> link 1 down” error. The Reason 5 solution I’m not familiar with as it hasn’t been explained in any of the lead-up tutorials …

For Step 7, I’m also not familiar with what exaclty is required. I only know that I can modify the required settings at the Mission Planner page (screenshot below):

Looks like I’ll possibly have to organise extra, paid, external Tutoring classes so that I can progress. But I wonder if this matters at all to Dojo Drones, e.g. in the (screenshot below) you can see the level of Support that I’m receiving …

Shortly after receiving the drone kit via postage, ‘reverse polarity’ occurred (parts of the drone were permanently destroyed) as a result of the provided XT60-Deans adapter having a serious manufacturing fault. I definitely appreciate Caleb’s support, here & there, back then, via email. But the vast majority of the drone restoration was my own effort over the last few months.

The drone currently flies well in all the required modes (via remote control), but I can’t be absolutely certain that the Flight Controller hasn’t been damaged, which (might?) be interfering with the (autonomous) flight aspect. And yes, I did purchase the warranty/insurance option as part of my drone kit order.

I’ve therefore had to turn to external Tutors, as well as an industry contact. Two of the Tutors I’ve met with are a Programming university lecturer, & a Programmer that holds a PhD in programming, respectively. The industry contact is a semi-retired embedded systems engineer, who served the Royal Australia Air Force for many years, & has experience in teaching programming. It’s probably best that I don’t mention here how bitter his opinion is regarding the many teaching/support gaps in the Dojo Drone course, which includes “beginners” for its targeted market - https://dojofordrones.teachable.com/p/how-to-build-a-raspberry-pi-drone , but it ain’t pretty …

While I try to figure out what to make of all this, maybe you could “list out the entire sequence to use”, as you offered in an earlier message (screenshot below) …

Also, at the following web page, please specify which exact OS I should be using, but also considering that if you suggest that I install a version other than the ‘Buster, December 2020, 32-bit, Lite’ version that was demonstrated in the Dojo Tutorial, I’ll potentially require lots of support from this forum if I run into any issues: https://www.raspberrypi.com/software/operating-systems/ . And if you think that a ‘Desktop’ (non-lite)/full, or even ‘Legacy’ version may be more appropriate, please also mention this …


#10

Ok. I managed to arm the drone. I’m not sure exactly waht helped solved the issue, but I did use a spare/new Raspberry Pi 4 & SD card, & installed a fresh RPI OS version (Legacy, Desktop, December 2021), given that the RPI website recommends Legacy for “educational users who would like to follow instructions and tutorials online”: https://www.raspberrypi.com/news/new-old-functionality-with-raspberry-pi-os-legacy/